Nuts About Time Clock Construction.
home | videos | construction | control | lab book | team

|
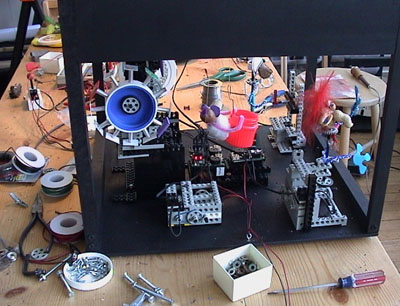
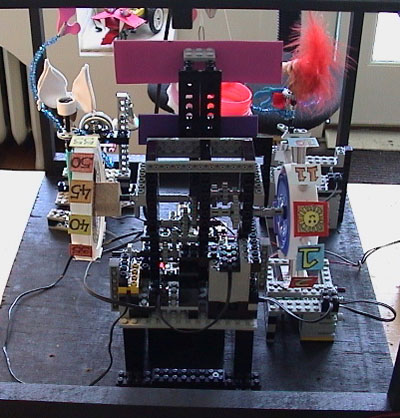
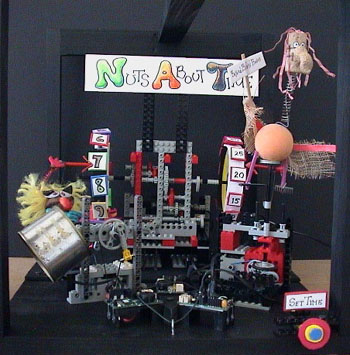
The clock is designed so that nut head characters and even the mechanisms
that drive the nut heads can be interchanged easily. The bell ringer should turn counter clockwise to avoid jamming. See the Control section to connect Crickets to mechanisms. |

|
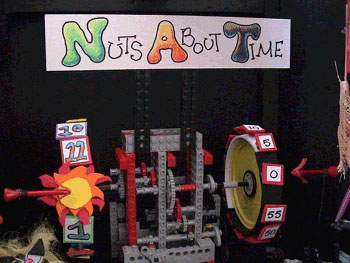
Arrows hang from the plastic grid on the top to point to the time on the
minute and hour wheels. The nuthead hanging on a string should start near the top so that when the gear train unwinds the string the nuthead comes down. When the gear train winds the string the nuthead will go up. |
|
Since the clock must be operating 24x7, it is highly recommended that plastic "grease" be used. You can get good "grease" from the Tamiya gear kits. |
|
The minute and hour clock wheels are mounted on the shafts so they can be turned to set the time. |
|
The motor cable that controls the clock motor must be connected with a polarity that makes the time (minute and hour wheel numbers) go forward. Clock motor turns clockwise. |

|
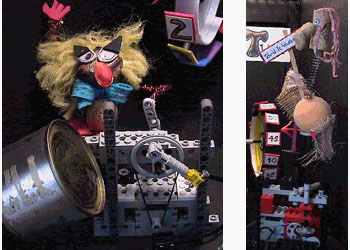
The switch that detects when the bird reaches the top is quite reliaible if the
string is threaded from the outside to the inside
so it forces the lever arm to press against the switch. Hang #1 fish weight from the 2nd to last hole on the lever at top to keep the lever normally down or the switch open. Insert string in the last beam hole. |

|
This gear train will wear down quickly if the bird it is controlling is too heavy. The nylon fish string length can be adjusted easily by threading it through a collar and then slipping the collar onto the shaft. Better than trying to tie a knot. |

|
The clock gear train has tested to be very reliable ...
over 10,000 minutes without breaking or even noticeably wearing. A Cricket controls the source shaft to turn 1 revolution every 60 seconds. A 1 to 60 gear train (8/16 * 8/16 * 8/24 * 8/40) turns the minute wheel 1 revolution every 60 minutes. A 1 to 12 gear train (8/16 * 8/16 * 8/24) turns the hour wheel 1 revolution every 12 hours. |
|
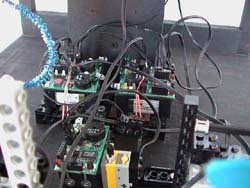
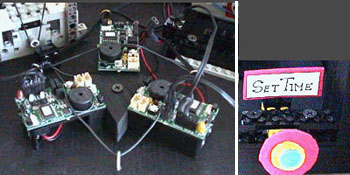
The 60 second timing Cricket must be facing the clock control Cricket and the
Nut Head Cricket because it sends signals to both.
Use a 9V ac/dc converter, not a 12v.
A 12v converter may make the clock motor spin 2 revolutions before the motor stops.
Crickets were shipped with the timer code set to trigger every 20 seconds instead of 60 seconds in order to see the mechanisms move more frequently. It will not keep accurate time!!! |
|
Version 2 is built a little more robust than Version 1. It does
not include the up/down bird that was less reliable than the other
mechanisms. The bell ringer should turn counter clockwise to avoid jamming.
|
|
See the Control section to connect Crickets to mechanisms.
One difference between V1 and V2 is that on V2, the viewer can set the time by fast forwarding the clock motor. The clock will then keep accurate time, the viewer gets involved and the viewer can watch how the clock gears work. |
|
To set up the clock so the hour and minute wheels are sync'd, mount the axels so that the hour arrow is pointing to the sun and minute wheel arrow is pointing to "0" Then push the Set Time button until the arrows point to the correct hour and minute time. Arrows made of golf tees point to the time on the minute and hour wheels. They may need to be adjusted after travel. |
|
The nuthead characters may be interchanged. The most common failures
are:
1) Rubber bands between motor and gears break. Both are on the front and pretty easy to replace. 2) The pipe cleaner on the bell arm breaks as a result of bending every time the bell works. Both mechanisms have worked for almost 4000 cycles x 5 seconds without failure although there was some sign of wear to the axels and the rubber wheel on the up/down plunger. |

|
The top panel enables a spot light to be placed anywhere. It is
fastened by twisting wires. If the spotlight is too close to the
plastic, it will melt!!!
The side panels are all screwed on for easy maintenance. Power is connected by inserting a 9V converter with a male, coaxial DC power jack 5.5mm O.D. x 2.5mm I.D. |